|
Astronomy Portal to the Heavens, Deep Sky and Universe
|
|
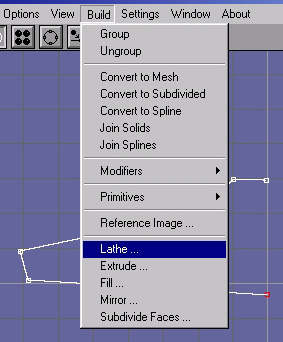
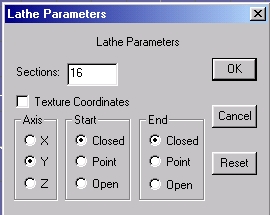
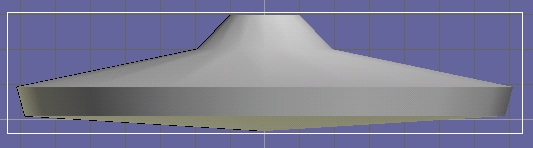
OrbiterSim | FAQ | Acronyms | Add-ons | Screen Shots | Orbiter Tutorials | >>Developer From 3D Model to Space Flight This tutorial is for anyone who would like to build their own 3D Model for Orbiter. It was written for those who know absolutely nothing and need a place to start. Therefore it is intended to be the very first step toward bigger and better things. Follow the instructions below and you will have your very own model flying in Orbiter in a matter of minutes. First off this is not a tutorial on 3D modeling so don't try to create anything in particular at this time. Just run through the steps and learn. If you already have a 3ds model available you may skip right to step 4. Otherwise just work through these three parts, create model, convert to mesh and fly model. Part A. Create a simple 3D Model 1. Download/extract Anim8or and Msh_MakerV121.exe into a development folder 2. Open up Anim8or 3. Creating a simple 3D spacecraft (UFO) Use the straight path tool (Front View) and draw straight lines like so
It should come out looking like this: Next we need to rotate the model so it's facing in the right direction for flight. Go to the menu bar and select Edit, then select Rotate | Rotate custom Then, Set x-axis = 270.00 This will orient the the ship for Orbiter by placing the top of the ship pointing in the z direction Now from menu bar select Object..Export Part B. Convert 3D Model to Mesh 4. Drag and drop the input.3ds file you just created into the same folder as Msh_MakerV121.exe. Run Msh_MakerV121.exe by double
clicking on it. Msh_MakerV121.exe needs this debug.txt file to start with so now with this file in place run Msh_MakerV121.exe again. This time you should get a new file called output.msh. This is your Orbiter mesh file. Part C. Test Fly 3D Model 5. Rename output.msh to dev_ufo.msh and drop into the Orbiter Mesh folder 6. Download the ufo scenario and config files. 7. Now run Orbiter and open the ufo.scn to test fly.
You now have the basic knowledge on how to create something even greater. Look at the ufo.cfg file in note pad and learn from it. Go back into anim8tor and be creative. See anim8or tips for more on using anim8or. Have fun! Also more advance tutorials made easy; Related Links: Design a Soyuz spacecraft in a couple of strokes
|
Space Exploration DVDs
| Space Exploration Books | From the Earth to the Moon | Earthlight: NASA - Spectacular Views
|