|
Astronomy Portal to the Heavens, Deep Sky and Universe
|
|
OrbiterSim | FAQ | Acronyms | Add-ons | Screen Shots | Orbiter Tutorials How to build your own Solar System Step 4. Build Textures for planets and moons cont... Method 2. Make your own custom planets Planet textures can come from anywhere and anything. This opens the door for some of the most unusual and bazaar creations. You'll begin seeing planet textures everywhere you look and you'll be amazed at how much fun this can be. A digital camera is all you need or do like I did and just grab the textures off the web. Tip! The foundation to producing a good believable planet is starting with a very large file. Look to get a photo that is at least 4096 X 2048 resolution ( level 7 size ). Do not skimp on this point. A good looking photo will be stretched to complete ugliness over the planet surface otherwise.
You are not going to find photos that are 2 by 1 ratios as need for planet textures. So what you do is set your canvas size in Photoshop to be 4096 X 2048 and then paste the digital image into it. If you have a sufficiently large picture some cropping will acur. Place the image on the canvas the way that best suit the look you are after. You may have some white space that needs some filling in too. Just take some clippings as filler or use the rubber stamp tool. Care must be taken not make the texture look repetitive. This takes some skill and technique that can only be learned by doing. One planet in my system got its texture from an old rusted piece of sheet metal. Another planet Adain from Anwar was created from a digital photo of slate rock. I got this one by typing textures into google. It's amazing what you can come up with.
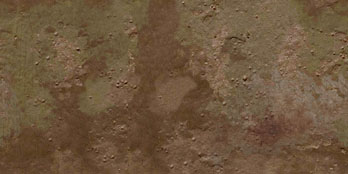
A little work in Photoshop. Some filling in the white space, give it some earth tones. And...
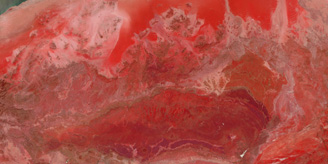
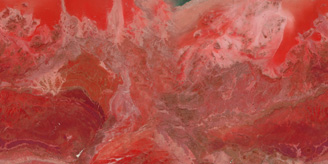
Here we have it. A full wrap around texture ready to be processed with the pltex tool. But there is one secret I hadn't let you in on yet. Thats how to make a seamless wrap around texture. Take for example the texture below if we make a planet from it now it will have a distinctive line where the two edges meet.
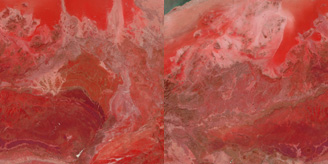
What we need to do is wrap the photo so that the line is clearly visible in the middle. In Photoshop this is accomplished by using the offset tool. Select Filter/other/offset from the menu. The offset filter box will come up. Check the wrap around setting then set the horizontal to half its pixels. This will wrap the photo so the edges appear in the middle. Your texture will look like this.
All that needs to be done now is to remove the distinctive line with the rubber stamp tool. Now you have a complete wrap around texture, no edge.
Since this is not a true planet texture per say once converted into a planet you will notice that as you get close to the poles the more the image gets stretched. You may want to darken these areas or even place ice caps there. Now onto Method 3. Adding water and clouds to planets
|
 To get very believable planets I look to nature. Therefore the artwork for my planets comes
from natural formations. Look at this planet created for my
To get very believable planets I look to nature. Therefore the artwork for my planets comes
from natural formations. Look at this planet created for my 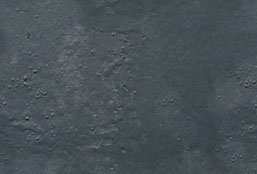
Space Exploration DVDs
| Space Exploration Books | From the Earth to the Moon | Earthlight: NASA - Spectacular Views
|